
From Idea to Inbox: How to Launch Sales Campaigns and Personalize Word Templates in Business Central
09.05.2025

If you work in sales or marketing, this article is for you. Today, we’re looking at Business Central from a different angle — not just as an ERP for finance and operations, but as a tool that can support your sales activities too. If your company doesn’t have CRM or a specialized email service, here’s the good news: you can still run targeted, trackable campaigns within Microsoft Dynamics 365 Business Central.
Case: Preparing for the Big Discount: A Journey in Business Central
As a sales manager or marketing specialist, you're always looking for new ways to engage with customers and boost sales. Now, you’re excited about launching your company’s new bicycle. To generate buzz, it has been decided to offer a 15% discount, a great opportunity to attract customers.
Here’s the challenge: How do you reach the right people at the right time without manually sending and personalizing hundreds of emails? With Business Central, you can automate personalized emails, target relevant contacts, and track your campaign’s success in just a few steps.
In this guide, I’ll walk you through a simple step-by-step process. Let’s get started!
Step 1 - Creating the Campaign
First, create a new campaign on the Campaigns page. Let’s name ours: “15% Discount on Bicycle – Winter Promotion.” Set the start and end dates to define the promotion period, add dimensions like Department and Project Code, and change the status to Planned.
Assign a Salesperson Code to specify who’s responsible for this campaign, of course, that’s you (who else could do it better?).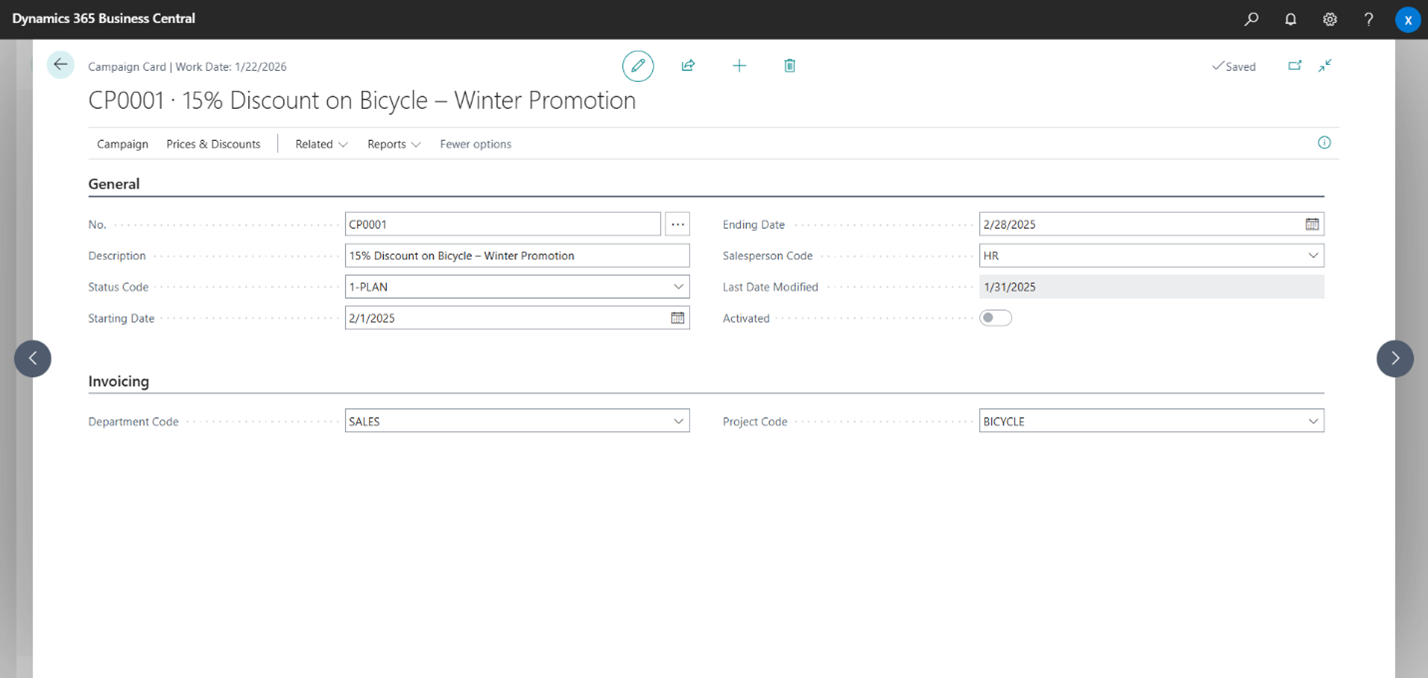
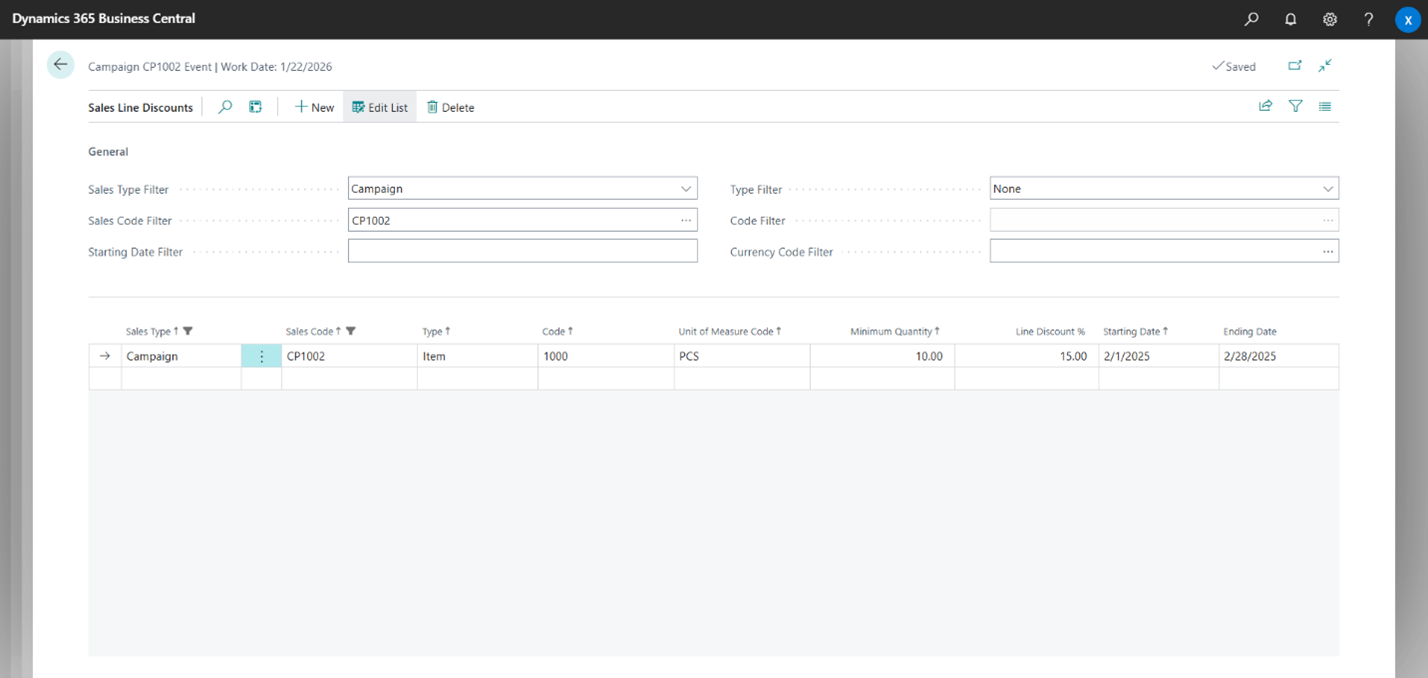
Next, configure the discount:
Note: Campaigns can also be informational-only, setting discounts is optional.
With these details in place, the campaign is structured. Now, let’s define your target audience.
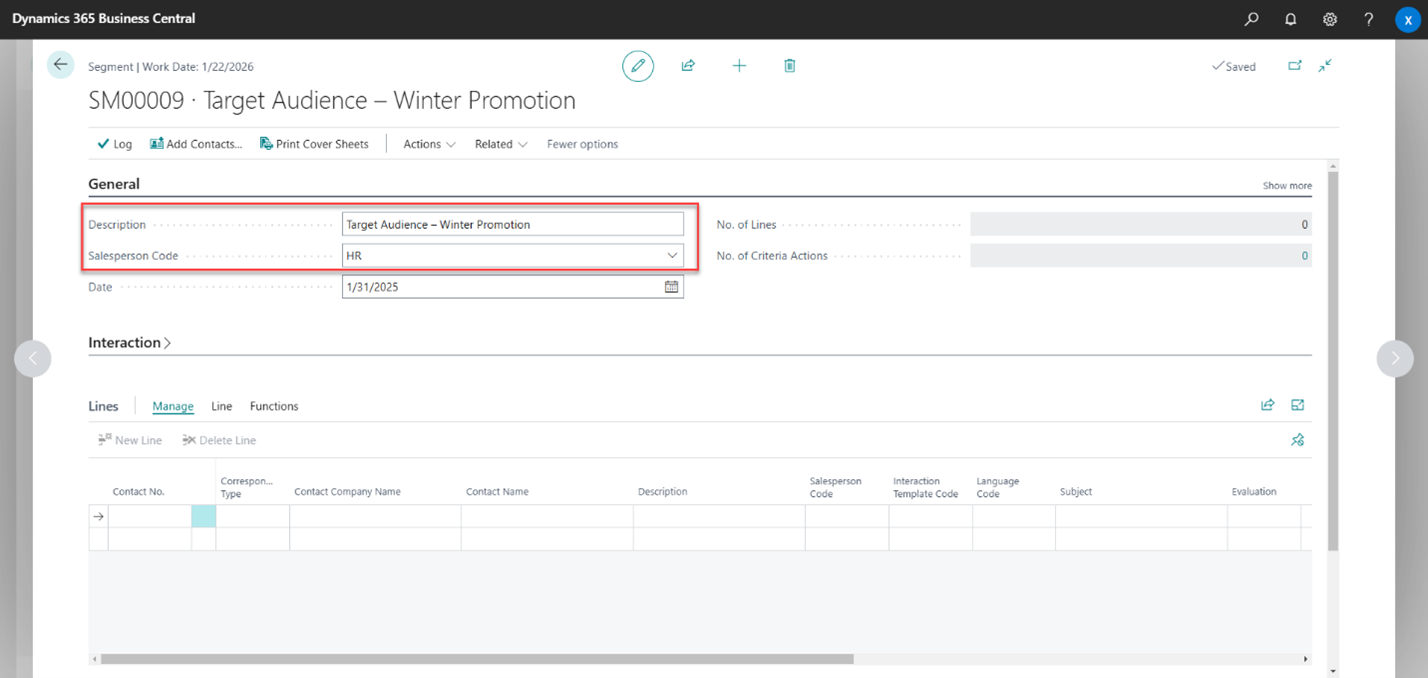
Step 2 - Defining the Target Audience
Your next step is to identify the right recipients for your campaign, those who will benefit the most from the discount.
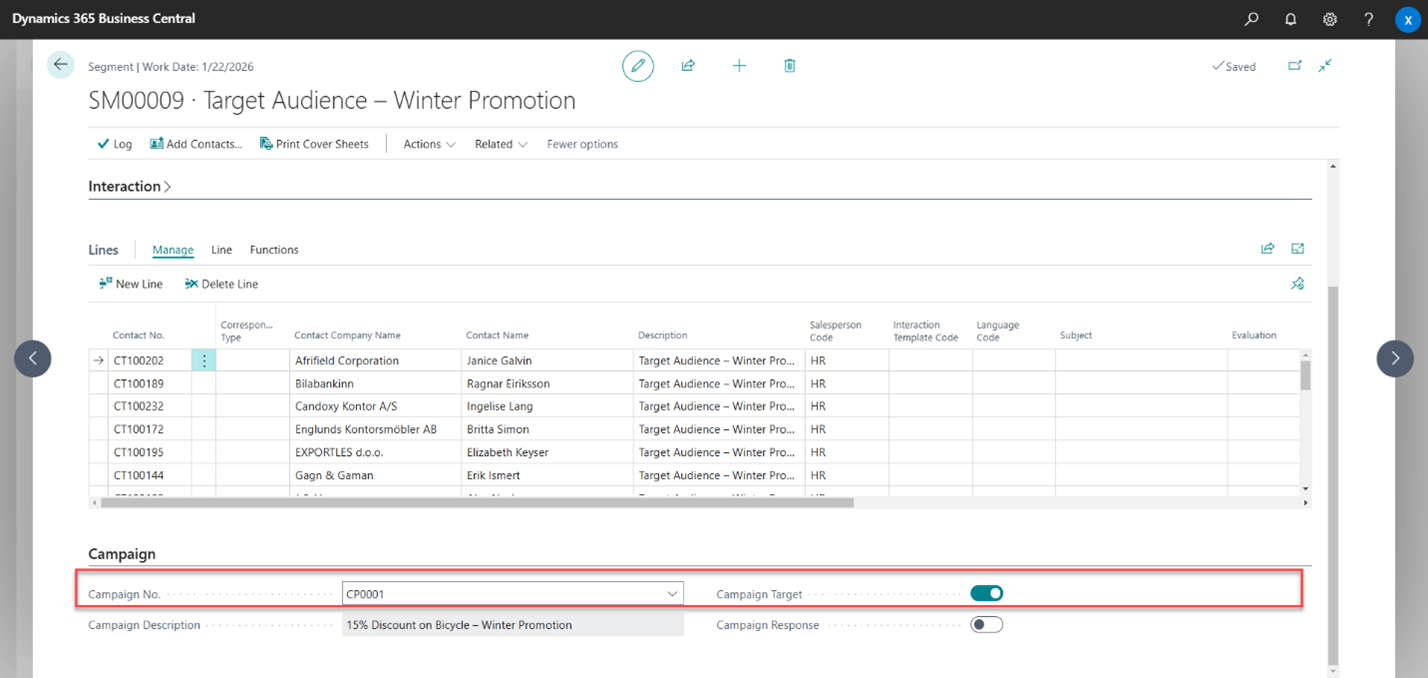
Create a new segment “Target Audience – Winter Promotion” from the Segments page and specify the responsible person for managing this segment and tracking responses.
Click the Add Contacts action on the ribbon and use filters (e.g., country, industry group, mailing group) to refine your audience. For this campaign, let’s focus on customers with specific job roles, like purchasing contacts, to ensure the discount reaches those who will benefit most.
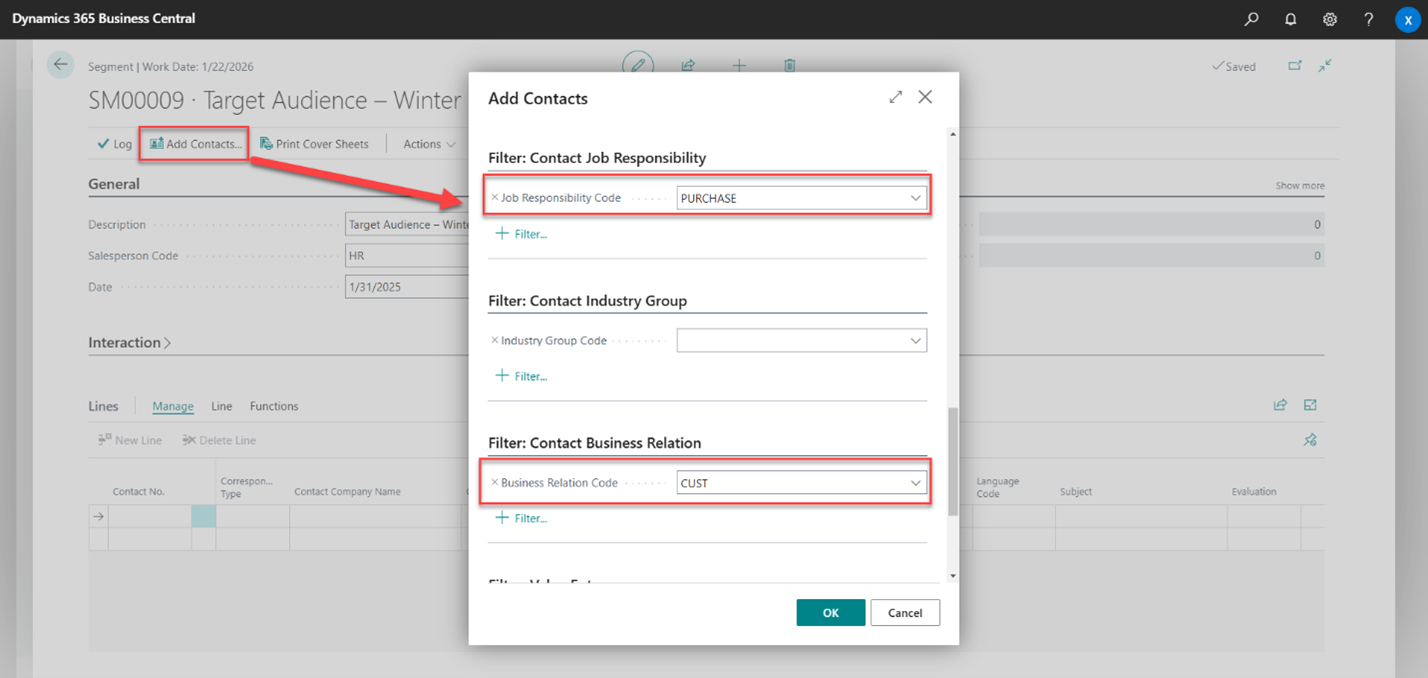
Insert filtered contacts into the segment. The 'No. of Lines' field will display the total number of added contacts. If needed, use the 'Reduce Contacts' action on the ribbon to further refine your list.

Finally, on the Campaign tab, link your segment to the campaign and enable ‘Campaign Target’ to mark this group as the campaign’s audience.
Once your target audience is defined and linked to the campaign, it’s time to create the interaction template.
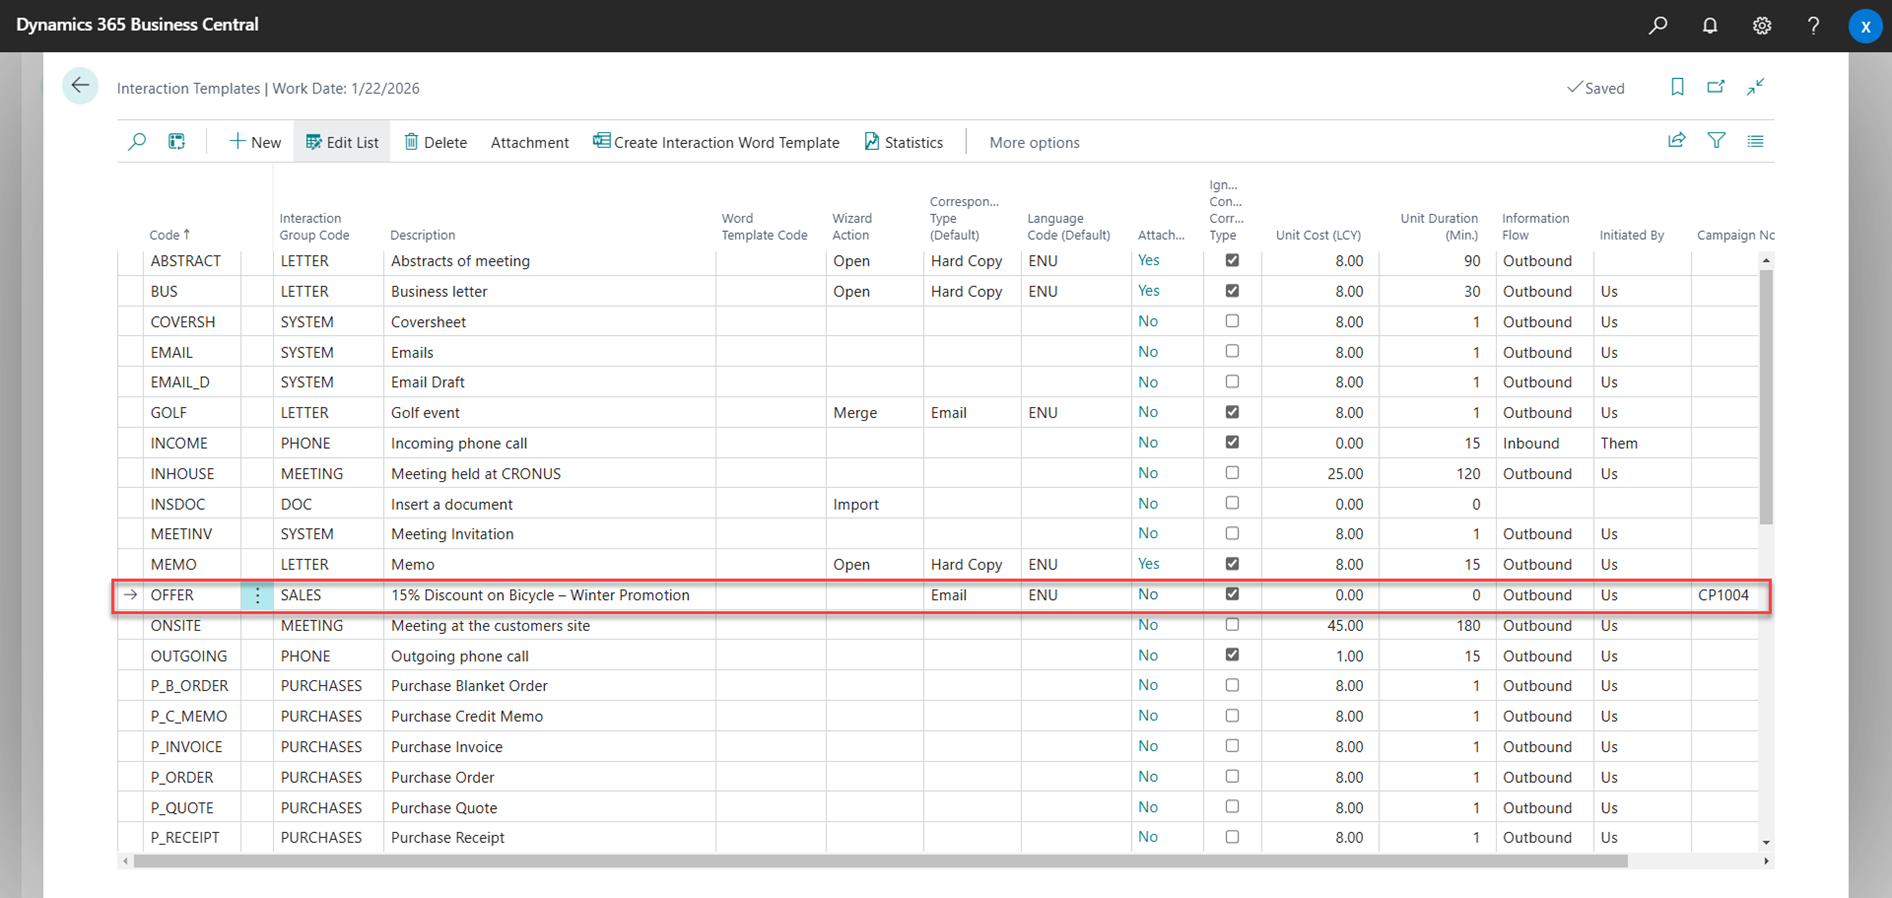
Step 3 - Creating the Interaction Template
An interaction template is a model that defines the basic characteristics of an interaction. In this case, it refers to any customer interaction related to your campaign.
To create the interaction template for this campaign, follow these steps:
1. Create a new record from the Interaction page (e.g., “15% Discount on Bicycle – Winter Promotion”).
2. In the Correspondence Type field, select Email to specify that the interaction will be conducted via email.
3. Set the Default Language based on your audience’s region.
4. Choose Information Flow: Outbound to show that the communication originates from your company and will be sent to the target audience.
By setting up this interaction template, you ensure that all key details, such as communication method, origin, and cost, are logged, making it easier to track the success of your campaign.
Now, let’s create a custom Word Template that looks great and feels personal.
For more expert insights, explore additional publications from our Business Analyst’s Talks series - Optimizing Warehouse Storage: The Power of Fixed and Default Bins in Business Central
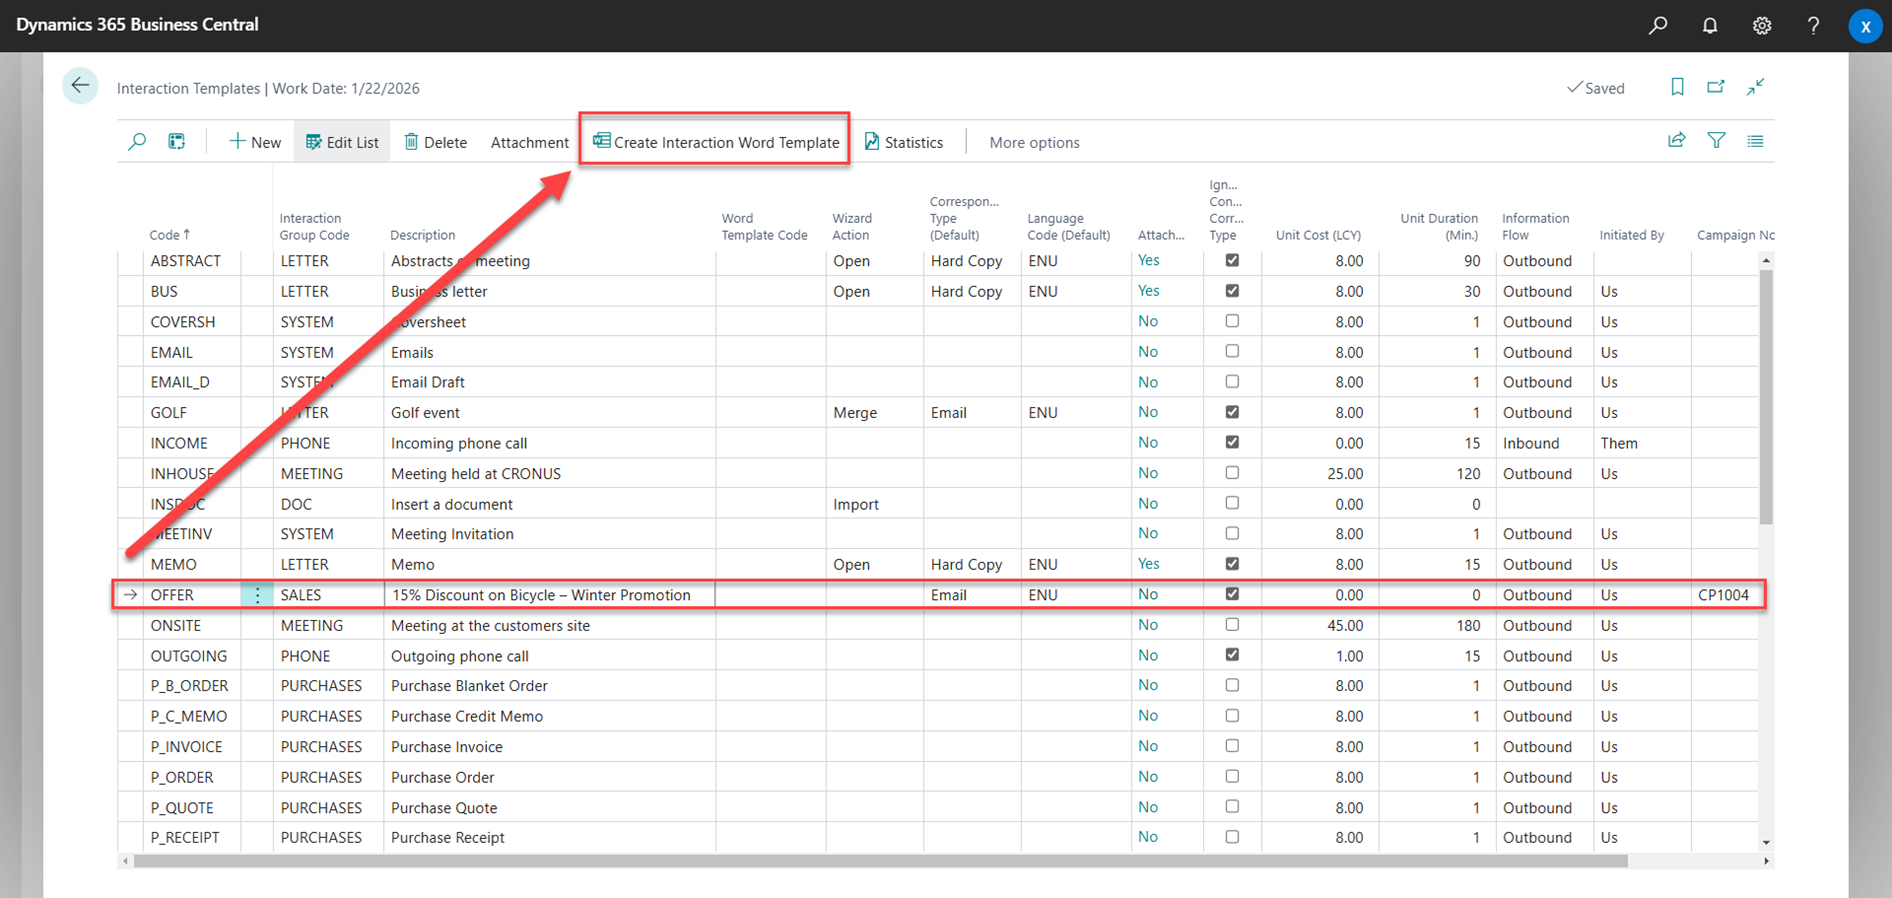
Step 4 - Creating a Custom Word Template
Did you know about the relatively new feature of creating custom Word templates? It lets you create visually appealing, on-brand emails with personalized details.
Steps to create a Word template and define data sources:
1. Open the Interaction Templates Page:
2. Select the Data Sources (Entities/Tables)
Business Central offers pre-configured tables like:
You may also want to add:
To include campaign details, use the ‘Add Unrelated Entity’ action and select the Campaign (5071) table. The ‘No. of Selected Fields section lets you choose the exact fields (e.g., Starting Date, Ending Date) that will appear in your Word template. Repeat this process for any additional tables you need.
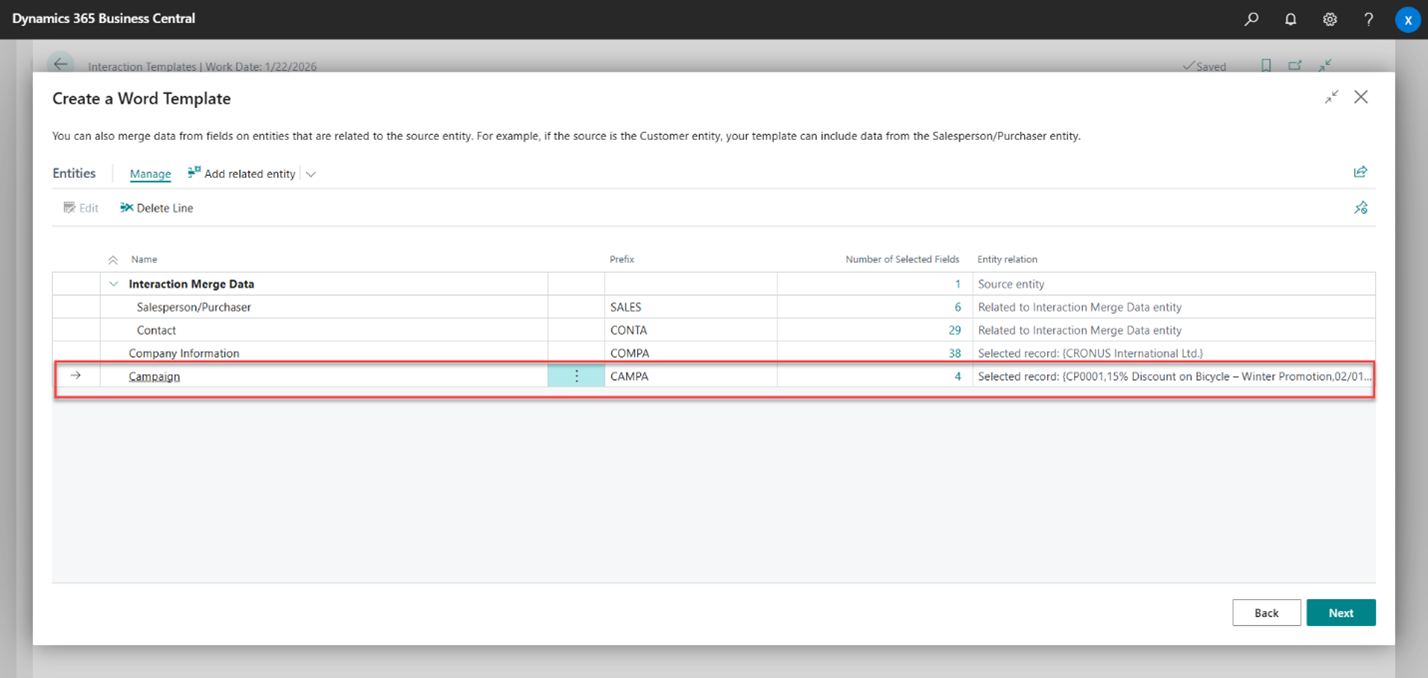
Now that you've selected the required data sources, it's time to configure the Word template.
3. On the Create a Word Template request page, click Next, then select Download Blank Template.
4. Extract the downloaded ZIP file – it will contain:
- A blank Word template.
- An Excel file with data from the selected tables.
5. Open the Word file, and you'll work with the Mailings tab.
If the Mailings tab is missing, go to Options → Customize Ribbon and enable it.
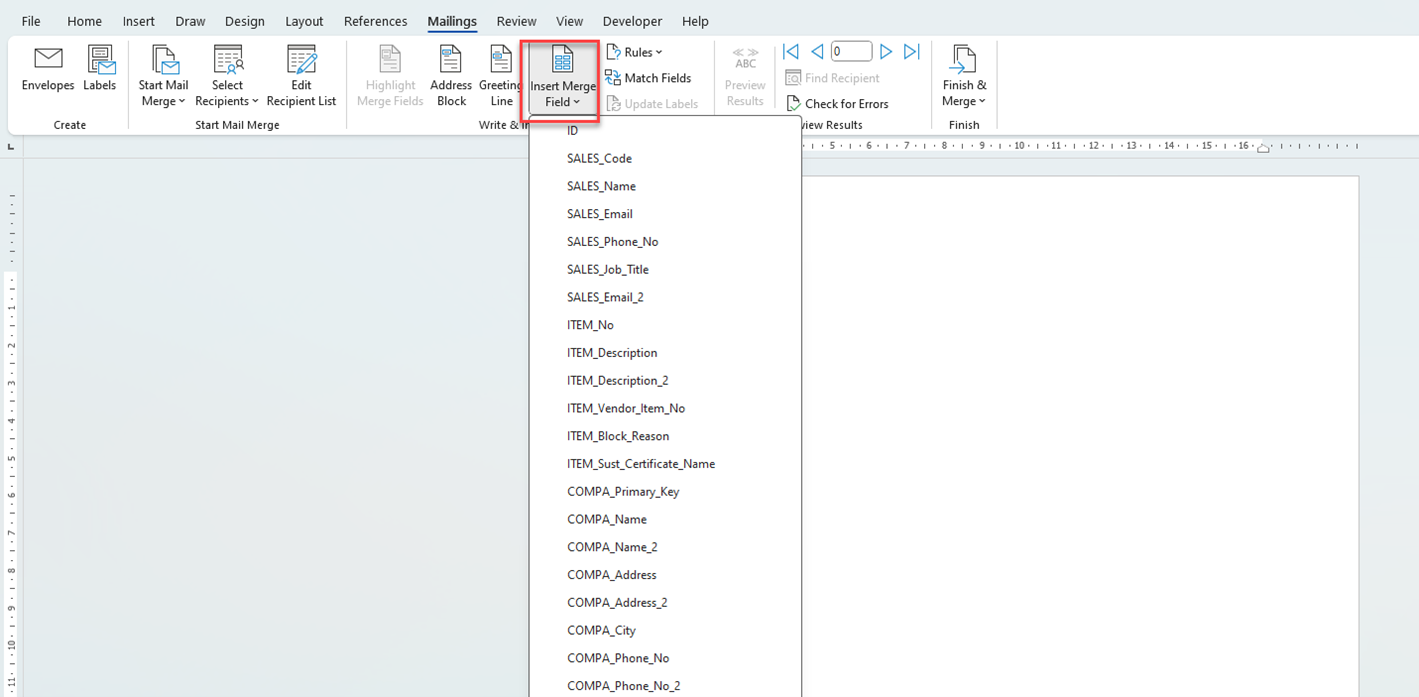
6. Click ‘Insert Merge Field’, which will display the fields from the tables you selected earlier.
If the fields don’t appear, click ‘Select Recipients’ → ‘Use an Existing List’ and select the Excel file from the unzipped folder.
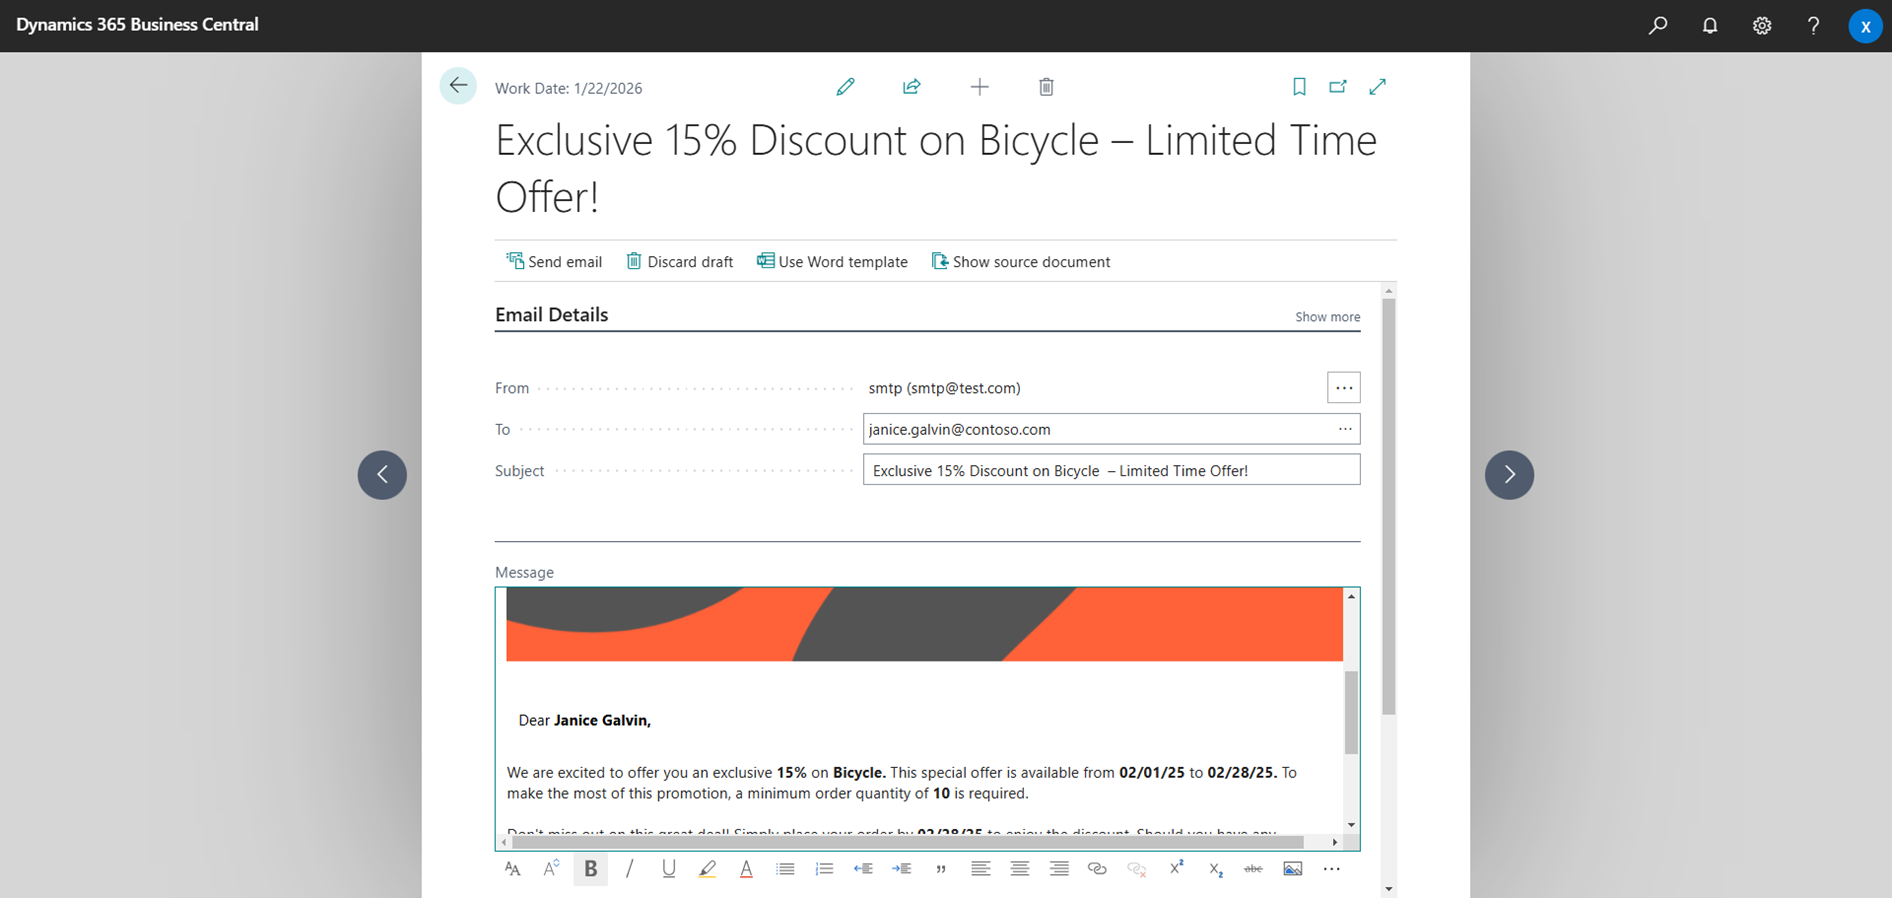
7. Design your email:

8. Use Insert Merge Field to replace placeholders with fields from tables.
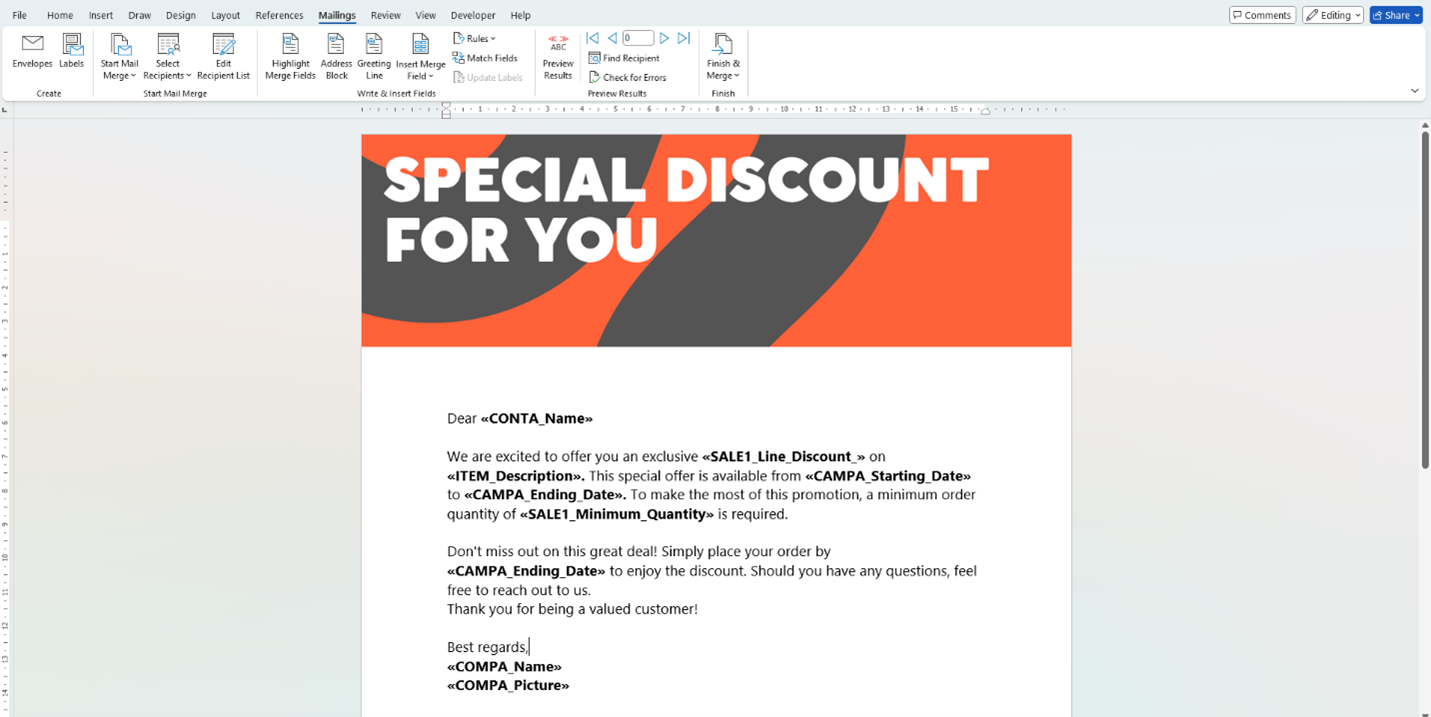
Once you've finished editing the Word template, upload the finalized version back into the system. Then, link the Word template to the interaction template you created earlier.

Your email template is now ready! It will automatically personalize messages for each contact for a more professional and engaging campaign experience.
Step 5 - Final Preparation Before Sending
Now that you’re almost at the finish line, it’s time to finalize the setup:
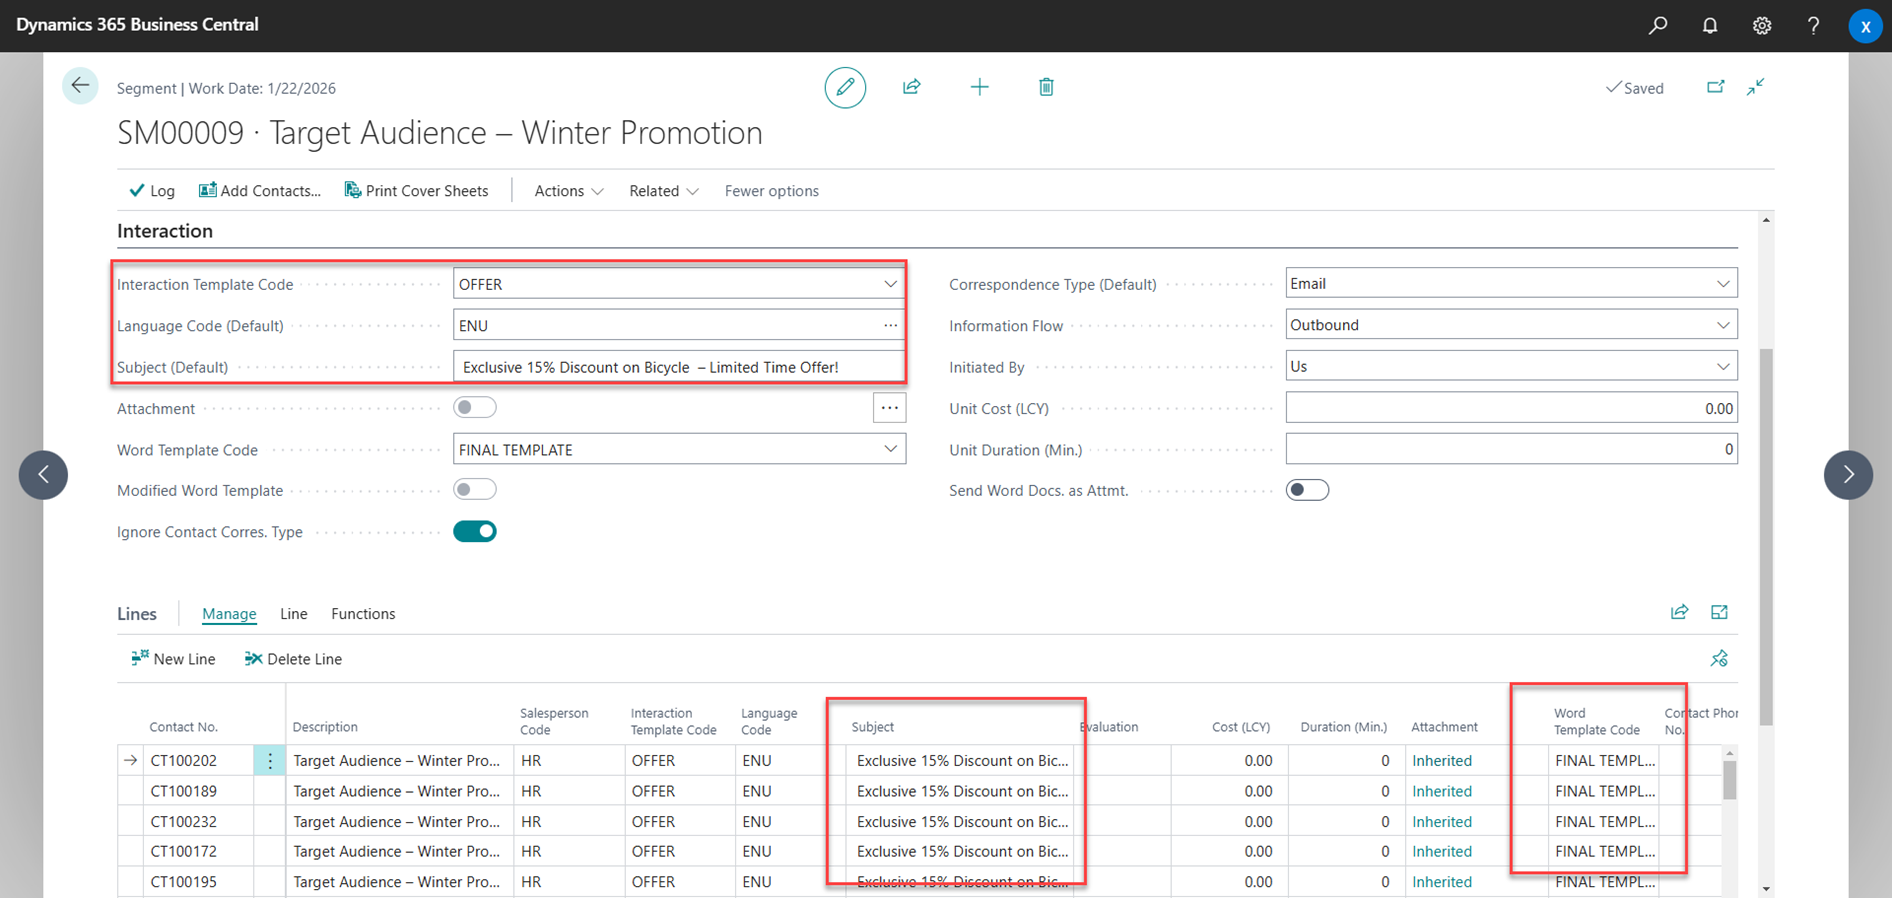
1. Link the Interaction Template to the Segment Card. (This updates the contact lines with email details.)
2. Specify the email subject in the corresponding field.
For customers who speak different languages, you can create separate interaction templates and adjust the subject line to match their preferred language.
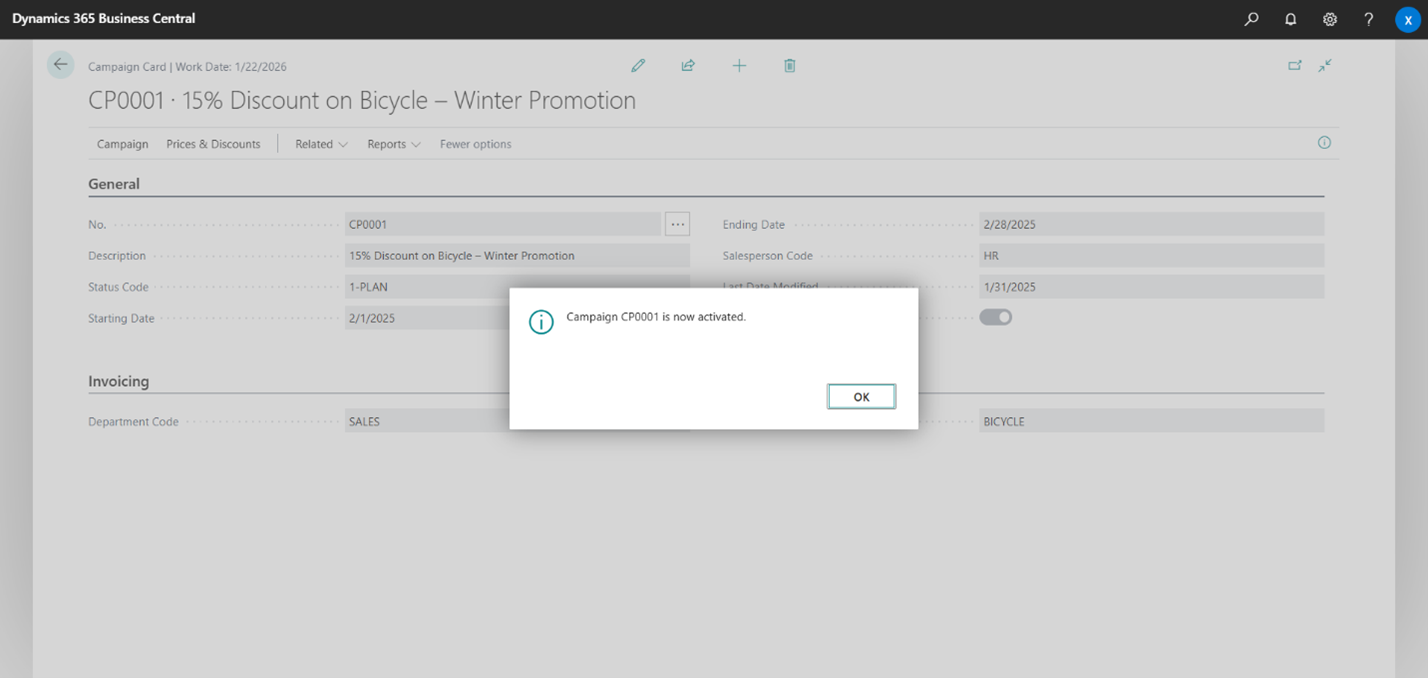
3. Activate discounts (if applicable):
Everything is set, let’s hit send!
Step 6 – Sending Emails
1. Open the Segment Card and choose Log action to send emails and log the segment.
2. Enable these 2 toggles:
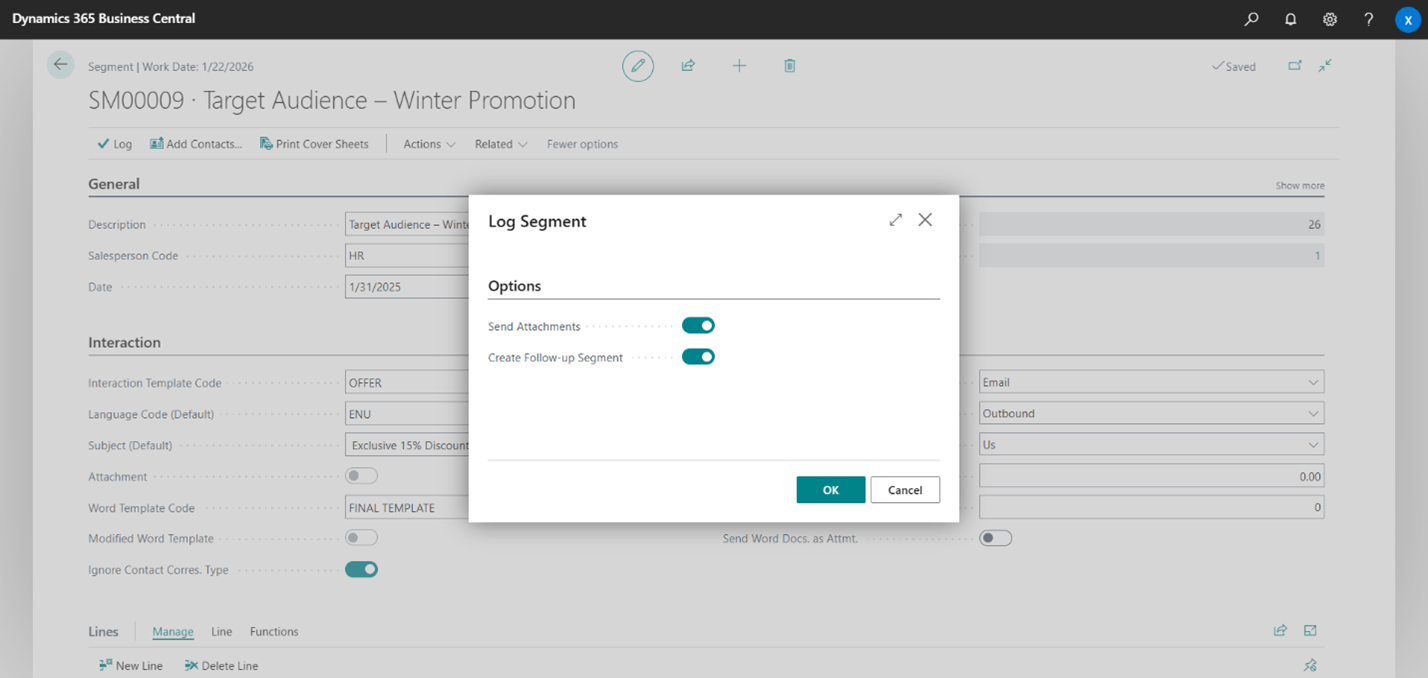
After the segment has been logged, it's moved to the list of logged segments. To check emails that have been sent, open the Sent Emails page. You will be able to open emails and check the applied Word template.
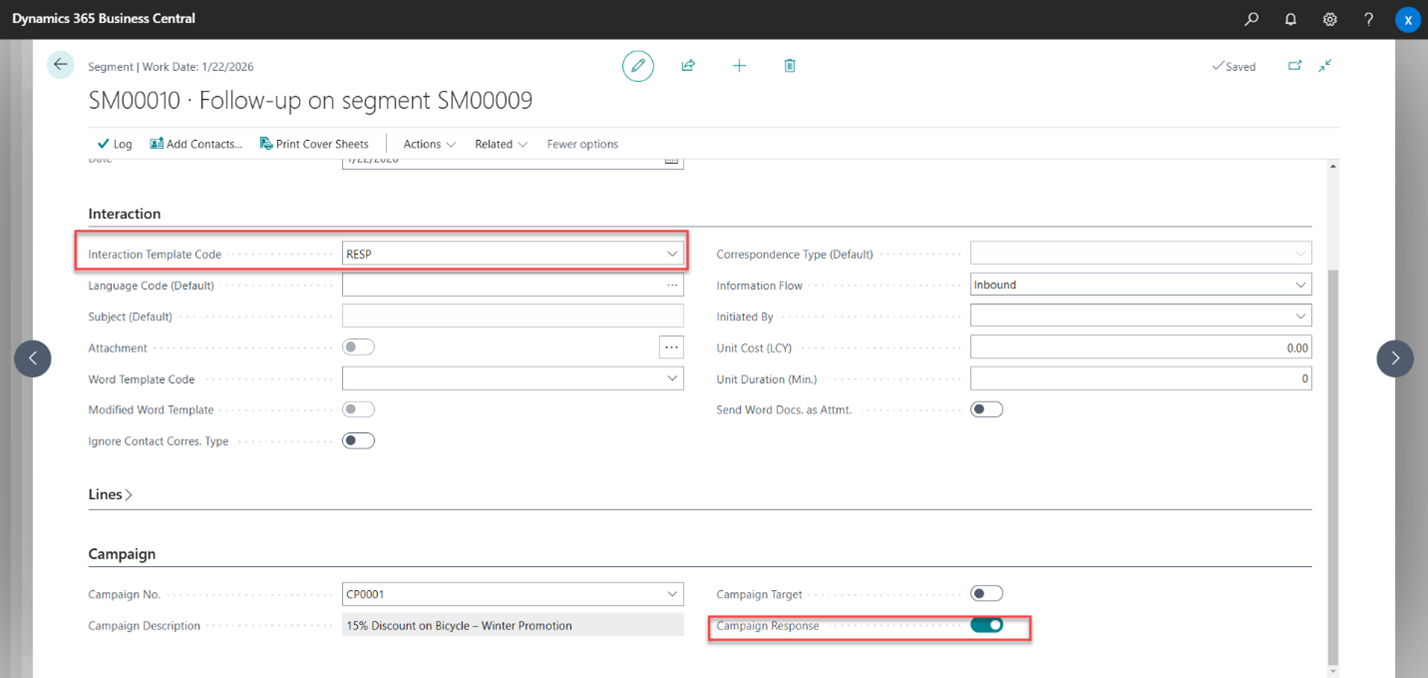
Step 7 – Managing Responses
When responses start coming in, track engagement using the follow-up segment:
1. Enable the Campaign Response toggle to mark this segment specifically for campaign responses. This keeps everything categorized and helps you track which contacts are engaging with your campaign.
2. Update contacts with engagement details (e.g., very positive, positive, neutral). These insights help you identify engaged customers and refine target segments for future campaigns.
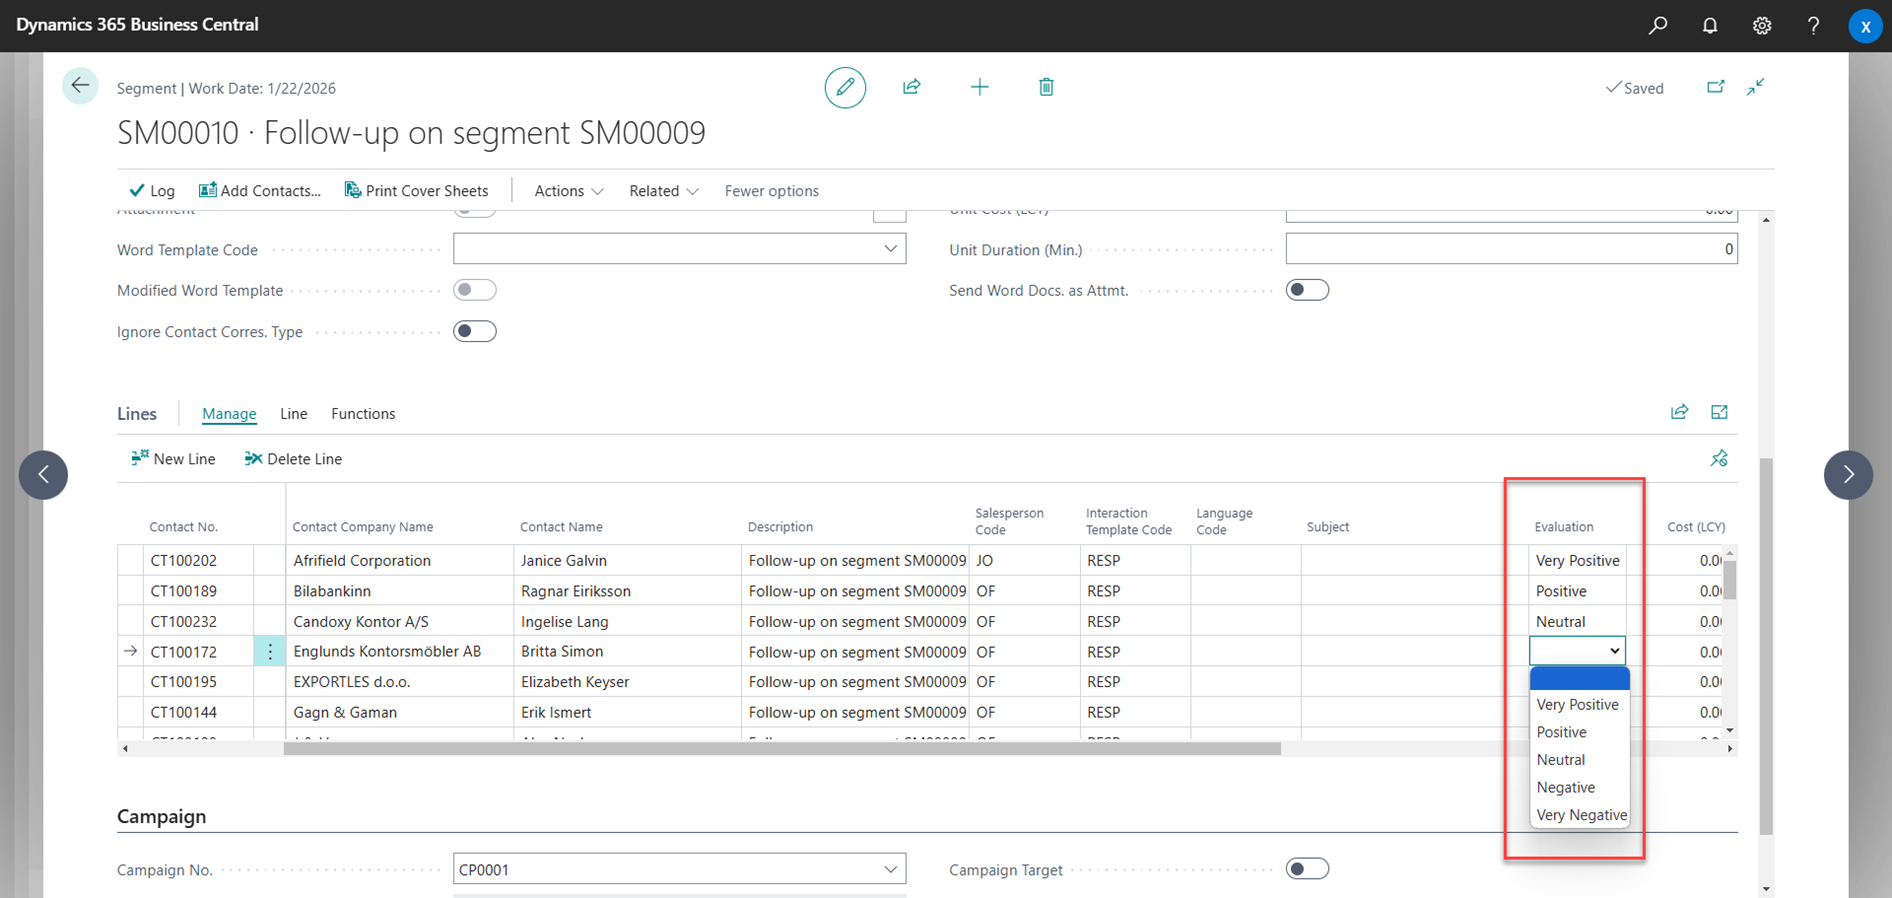
Finally, open the segment to update your campaign statistics. This gives you insights to refine future campaigns.
Conclusion
Managing sales campaigns can be challenging, but with Microsoft Dynamics 365 Business Central, it doesn’t have to be. From setting up segments to tracking results, you can manage it all right inside the Business Central you already know. Even if you don’t have a separate CRM or email tool, you’ll still be able to keep your campaigns organized. Try it now! Log in to Business Central and start your first campaign today. Your future self will thank you!
Do you happen to have any knowledge about Xpand?
Xpand is a product and service software development company with over 15 years of market experience and a Microsoft Partner since 2016, assisting organizations worldwide in managing their Microsoft Dynamics ERP systems. We provide a broad range of services for clients and partners, including implementation and development for Microsoft Dynamics 365 Business Central, as well as upgrade from earlier versions like Navision Financials 2.0.
Looking for a trusted partner to help you or your clients get more from Business Central? Learn what Xpand can do for you: https://www.xpandsoftware.com/services